Table of Content
Many of the ingredients and tools for homemade wax can be purchased, cleaned, and reused for significant savings in the long run. Apply a very small amount of oil to help hard wax stick more easily to the hairs. Chocolate, fruit, or honey wax can be reheated and used the same way as hard or soft wax, depending on which base is used.
When you wax, you apply the wax in the direction of the hair growth, then rip it off in the opposite direction. With sugaring, you apply it in the opposite direction and then flick it in the natural direction of the hair growth. I'll present you with the facts and let you decide.
Step 2: Break off one or two wax melts and put them in the wax warmer.
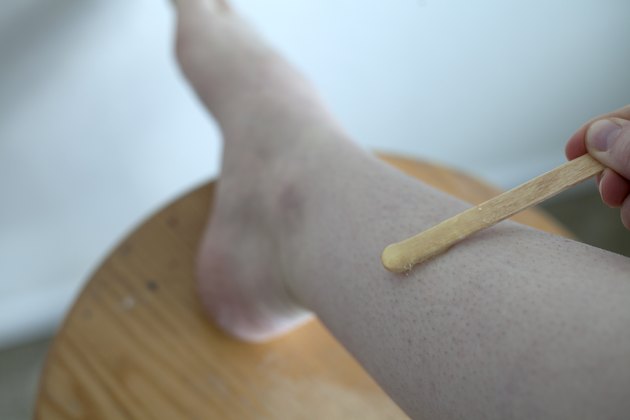
Apply the wax in the direction of hair growth. Dust the area with baby powder before applying the wax. Baby powder or cornstarch will absorb body oils and moisture, allowing the wax to stick to the hair , making the process much less painful. It's nice to pamper yourself sometimes with a trip to the waxing salon, but sometimes you just can't wait for an appointment. If you want to skip the salon and try waxing on your own, this article will show you a simple recipe to make hair removal wax on your own. Other types of wax include paraffin wax, soy wax, and polyethylene wax.
Whether it’s your bikini hairs, underarms, or even face hairs. With coconut oil and other natural ingredients contained in the wax, you’ll get a gentle feeling while removing the hair and making your skin feel silky and smooth. Though you can buy wax melts from candle making stores near you, it’s far more interesting to make wax melts by hand instead. You’ll find it so easy to get started, whether you want to make scented wax melts with natural candle supplies, or with leftover candles. You can apply it with your fingers or a popsicle stick. Be sure to apply the wax in the opposite direction of hair growth.
Unlock expert answers by supporting wikiHow
You'll only need three ingredients for an at-home sugar wax recipe, according to Gallo. It is not necessary to shower before waxing. Though you would have to make sure that the area you are going to wax is clean and free of dirt and oils.
Microwaves heat wax unevenly and may create extremely hot patches. To warm up your wax, place it in a bowl of hot water instead. Let the tallow cool for about 8 hours and harden completely. Leave the jars open in an area where they won’t be disturbed.
And The Audience Says…Pubic Hair or No Pubic Hair
You can add colors to your wax but make sure to adopt the procedure properly. Thanks to all authors for creating a page that has been read 2,980,913 times. Yes, you can use apple cider vinegar in place of lemon or lime. You can also use presqueezed lemon or lime juice.

I recommend drops to keep the scent strong over all the wax melts. You may wish to use fewer drops if using a strong oil like peppermint, and a few more drops if using a softer scent like lavender. You could even add in whole or ground herbs like cinnamon, if you prefer to avoid essential oils. "A lot of people when they try sugaring at home try flicking the sugar up, instead of parallel to the skin, which is more irritating," says Nartova.
What You’ll Need to Make Scented Wax Melts?
Save yourself from all the effort—because it takes a lot of effort. Again, this takes time and practice so if things aren't going according to plan, grab a cloth wax strip and press it against the sugar to remove it a little easier. Unlike candles, wax melts are a type of wick-less scented piece of wax that is melted in a wax warmer to fill a room with fragrance. They are made of fragrance oil, essential oil, and wax mixture. There are a few differences between traditional wax and sugar wax, and the process to use each. For one thing, sugaring tends to be less painful.

You can also use a warm water bath to speed the process. 3) Once the cannabis is sufficiently dry, put it and the bottle of alcohol in the freezer for three to five hours. It’s also important to understand that % alcohol is flammable. It’s nowhere near as bad as butane, but you don’t want to handle it around an open flame.
Spread it evenly until it's about 1/4 in (0.6 cm) thick. Work in small sections that are only a few inches in length and width. Remove the pot from heat when the mixture turns golden brown.
Most women learning to wax themselves first focus on the more-traditional complete removal of hair, which requires less precision. The same goes for making your own wax to dab. Start with a small batch, get the hang of the process, and then increase your production when you’ve got a bit of experience. If nothing else, you won’t waste any of your precious bud in a failed attempt to try something new. Just remember that dabs are concentrated cannabis, have a high THC or CBD count, and can really knock you on your back if you’re not careful. When we DIY a batch of dabs that is more hash than wax or shatter, we love to mix it in our favorite edibles recipes.
Gently stir the wax whilst pouring the fragrance. We suggest using up to 10% fragrance oil therefore 500 g of fragrance oil will fragrant 5 kg of wax. PreparationBefore you begin your wax melt making it important to prepare your space, especially as dealing with wax can be quite messy! Make sure you have a clean flat surface to work on, moving anything you don’t want to get wax on. Also make sure you have your clamshells at the ready as the process can go a lot faster than you might initially expect.
As wax melts will be placed in a wax warmer instead of standing on their own, it will be great to make wax melts with leftover candles. For example, if you’ve encountered a severe candle tunneling problem that can’t be fixed, you can use the leftovers to make wax melts. It helps you save some candle making supplies.
To make your own wax for hair removal, start by adding 1/4 cup of water, 1/4 cup of lemon juice, and 1 cup of white granulated sugar to a large pot. Then, heat the mixture over high heat until it starts to boil, which should take about 5 minutes. Once it starts boiling, remove it from the heat and pour it into a glass jar.
Ahead, everything you need to know about DIY Brazilians, including tips on how to make the process as painless as possible. That’s good to know that you should apply the wax in the opposite direction of hair growth. I wouldn’t want to mess anything up if I was going to perform waxing on myself, so that’s good to know. I’ll have to keep that in mind if I decide to get some waxing supplies. Like any great artist, you must first prepare your canvas, and that primarily involves the length of your pubic hair.


No comments:
Post a Comment